Editor’s Note: If you missed part 1, where we covered troubleshooting two-wire confirmation, click here to read the article.
A Marsh Marine/4 wire system is a completely different animal from two-wire. The first thing to note is that the Marsh Marine plug should be mated to the communication line with an underwater splice.
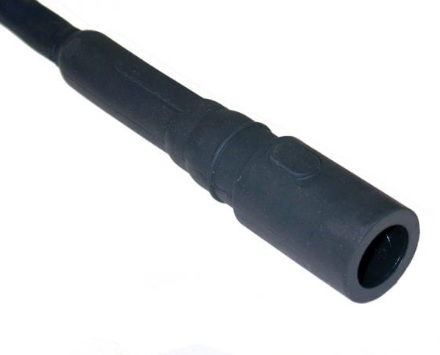
That’s great because theoretically, you don’t have wires exposed to the surrounding water. In fact, with the use of some silicone grease on the male side of the plug, you should have a long-lasting non-corroding pin sleeve. However, that’s if everything is well maintained and cared for. We all know that’s not always the case and if it was, you wouldn’t be reading this article this far wondering why your 4-wire system isn’t working correctly, right?
OK, so let’s get started. Do a continuity test and see if you one or more conductors that aren’t showing a good connection. Do a visual check on the topside connections to make sure that one of your leads didn’t break off. IF they did, life is easy and you just cut back the wire, strip, and re-install. One of the issues we find more often than not is corrosion on the internal pins of the female Marsh Marine plug. If that’s the case, then I have a simple and cheap fix. If you don’t have one, go out and get a round model file. You can lightly, and I mean lightly, run the file down each sleeve tube and clean it up. Many times, that solves the problem.
If you find that you have intermittent communication issues with one or more of the components (if it’s the wire, you’ll find that things like both speakers cut out or the mic sounds like bad cell phone reception) then your issue may be in the splice itself. If it’s the mic, try changing the mic out first. That’s going to be easier than our next task. Why? Because the next task is going to be cutting out and re-installing the splice.
So you can see that changing and testing a new mic is definitely easier than changing the entire splice and you don’t want to smack yourself in the forehead when you find out that you didn’t have to go to all of the trouble of putting a new splice in place.
If the issue is in the splice, more than likely someone (and no one will volunteer their guilt) pulled on the communication cable with some significant force. As mentioned before, installing a line bridge/strain relief can provide you with some insurance. It’s reinforcing that splice. Guarantee, no. But it will help.
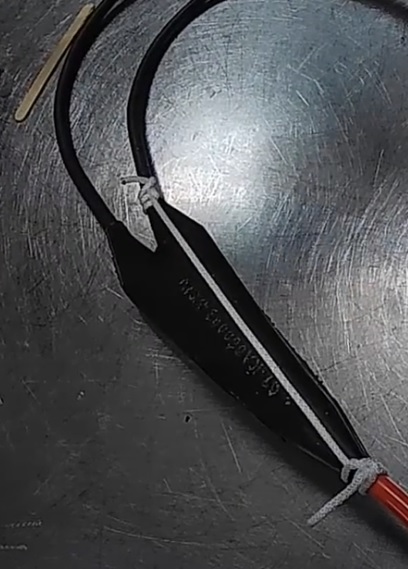
Make sure that any splices that you install in a 4-wire system in which the strength member and communications cable are the same component, that the splice is located on the diver side of the installed D-Ring. That splice will NOT hold the weight of a diver. I know it sounds obvious, but it had to be said.
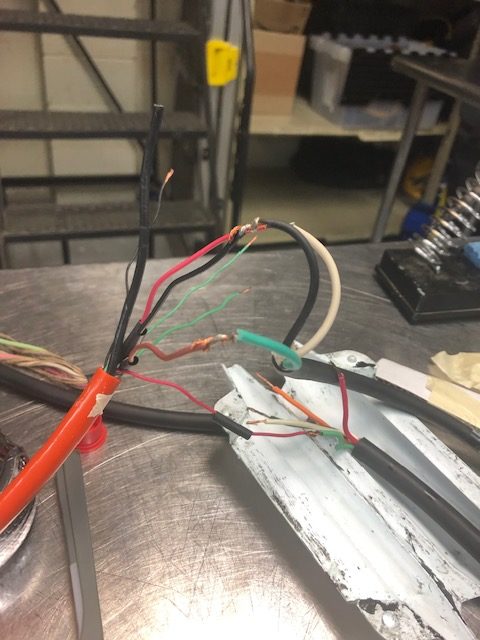
One last thing I’d like to note is when terminating on a 4-wire configuration, you need to make sure to pay attention to the twisted pairs of wire. When you strip the wires out of the outer casing, you’re going to discover a couple of things. First, that there are a couple of bare stranded wires that don’t seem to be used for anything. In this case, they’re not so just cut them back. You’ll also see that the 4 conductors are separated into 2 sets of twisted sets of wires. You need to keep them that way. One set will be used for the speakers and the other set for the mic. If you use a lead from one twisted pair and another lead from the second set and try to hook them up to the same component (let’s say speakers for this example), strange and frustrating things can happen when you are trying to communicate. These can include annoying squealing and comms drop out. So, keep the pairs together.
That should give you some good starting points on troubleshooting your comm cable.
Dive Safe